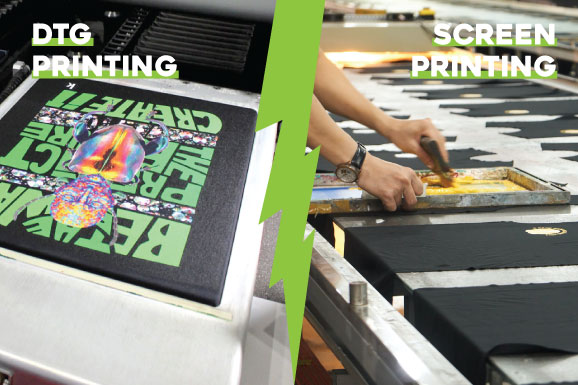
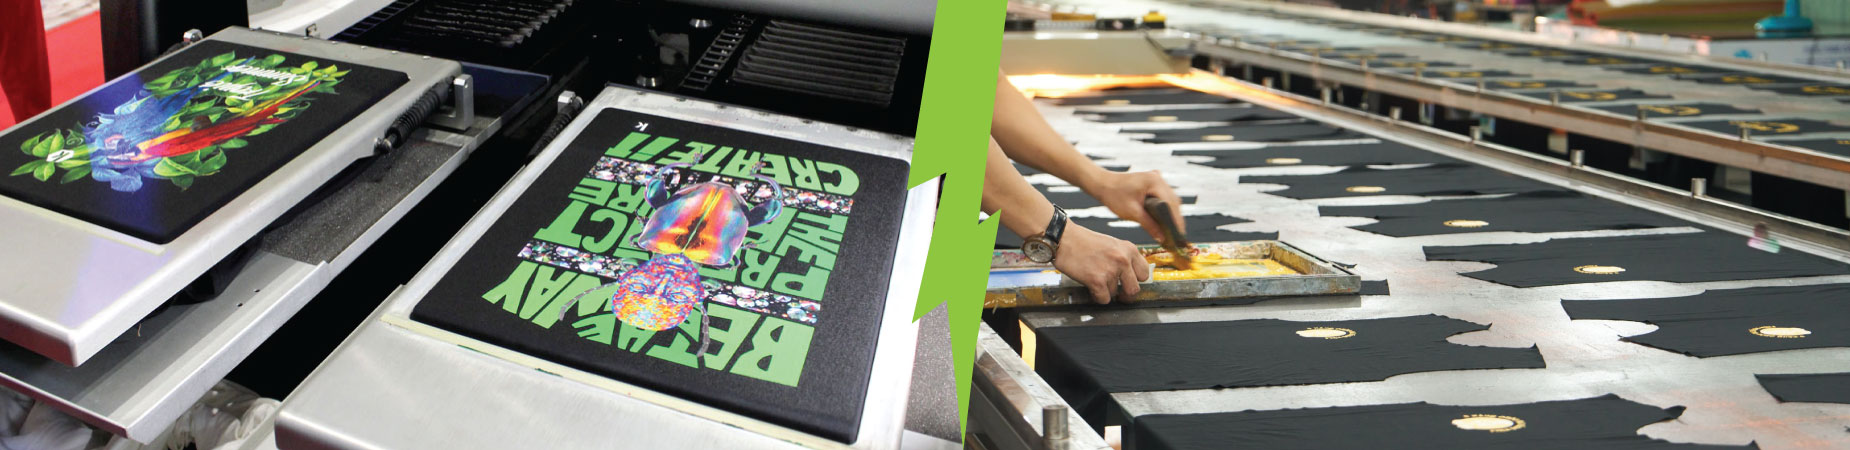
Direct-to-Garment vs. Screen Printing: A Detailed Comparison
The method of pushing ink through a stenciled mesh screen to create a printed design is known as screen printing. Even though you’ve rarely heard of the term yet, you’ve probably owned or used a screen-printed item. Serigraphy and silk screen printing are other names for the same method, although they all refer to the same core technology.
Screen printing is a common method for producing colorful canvases, art, and posters. Still, it can also be used to print fabrics and textiles, making it ideal for personalized clothes and items. We’ll answer all of your screen printing questions in this tutorial.
How does screen printing operate, and what is it used for?
Screen printing employs a mesh screen, ink, and a squeegee to transfer a stenciled image onto a flat surface. The most popular screen-printed surfaces are fabric and paper, but specialist inks may also be used to print on wood, metal, plastic, and even glass. The most simple approach is making a stencil on a fine mesh screen and then forcing ink (or paint, in the case of artwork and posters) through it to imprint your pattern on the surface underneath.
While the printing procedure is typically pretty identical, the manner the stencil is formed varies depending on the materials. Stenciling may be done in a variety of ways, including:

- Cover the appropriate portions of the screen with masking tape or vinyl.
- Paint the stencil onto the mesh with ‘screen blockers,’ such as glue or lacquer.
- Creating a stencil using a light-sensitive emulsion is processed similarly to a photograph.
Screen-printed designs might employ a single color of ink or a combination of colors. Colors must be applied in discrete layers for multi-colored goods, using separate stencils for each ink.
What is the purpose of screen printing?
The fact that screen printing generates vibrant colors even on darker textiles is one of the reasons why it is so popular. The ink or paint is also layered on the cloth or paper’s surface, giving the print an appealing tactile character.
The strategy is notably famous since it allows a printer to repeat a design numerous times easily. Because a single stencil can be used to duplicate a pattern several times, it’s ideal for making multiple copies of the same garment or accessory. Screen printing is, therefore, an extremely effective method for producing huge quantities of personalized clothes for sports teams or work uniforms.
It is also feasible to make complicated multi-colored graphics when utilizing professional equipment and an expert printer. While the intricacy of the process limits the number of colors that the printer can employ, it does allow for more vivid coloration than is achievable with digital printing alone.
A manual for screen printing equipment
A screen printer needs the correct equipment for the job to achieve a clean, crisp print. We’ll go through each piece of screen printing equipment, as well as the purpose they serve during the printing process.
Screen Printing Press
While screen printing may be done with simply a mesh screen and a squeegee, most printers prefer to utilize a press since it allows them to print a large number of products quickly. Because the press keeps the screen in place between prints, it’s easier for the user to change the paper or garment being printed.
The three types of presses offered are manual, semi-automatic, and automated presses. Manual presses are labor-intensive since they are operated by hand. Semi-automatic presses are partially automated but still require human intervention to change the objects being pressed, whereas automatic presses are fully automated and require little to no human intervention.
Businesses that need to print large quantities of things would typically employ a semi- or completely automated press, which allows for faster, more efficient printing while also reducing errors. A manual table-top press (sometimes known as a ‘handbench’ press) may be better suited to the demands of smaller businesses or people who conduct screen printing as a hobby.
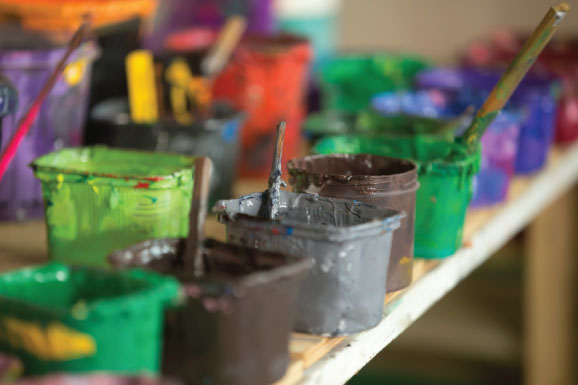
The Printers’ Inks
The ink, pigment, or paint is forced through the mesh screen and onto the printed material, leaving a colored imprint of the stencil pattern on the item.
Choosing ink is about much more than simply picking a color. There are a variety of specialty inks that may be utilized to achieve various effects on the final product. To provide a distinctive look or feel, a printer could employ glittering inks, texturized inks, or puff inks (which expand to create a raised surface). The printer may also consider the type of cloth being screen printed since different inks are better suited to certain fabrics than others.
Printers will use a type of ink that can be machine washed once it has been heat-treated and set for printing garments. This results in a colorfast, long-lasting garment that may be worn repeatedly.
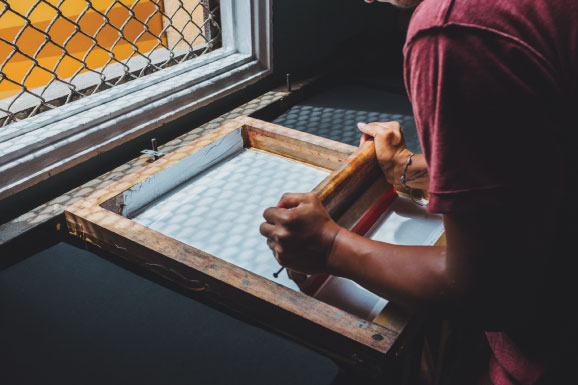
The Silk Screen
Silkscreen printing uses metallic or wooden frames with a thin mesh fabric spread across them. Traditionally, this mesh was made of silk thread, but polyester materials have replaced it, providing the same performance at a reduced cost. The mesh may be customized in thickness and thread count to match the texture of the surface or fabric being printed, with smaller intervals between threads allowing for more detail in print.
The screen is ready to use as a stencil once it has been coated in emulsion and exposed. It may be cleaned and reused when the screen printing procedure is completed.
The Squeegee
A squeegee is a long wooden, metal, or plastic handle with a rubber blade attached. It is used to force ink through the mesh screen and onto the printed surface. The printer will normally choose a squeegee that is around the same size as the screen’s frame, as this will provide greater coverage.
A harder rubber blade is excellent for printing elaborate designs with plenty of detail since it guarantees an equal coating of ink in all the nooks and crannies of the stencil. When printing less complex graphics or onto cloth, a softer, more yielding rubber squeegee is frequently utilized.
The Washing Station
The screens must be cleaned after each use to remove any remnants of emulsion so that they may be reused for future printing. To remove the emulsion, some bigger print shops use enormous tubs of special cleaning fluid or acid, whilst other printers clean their screens with a water trough or sink and a power hose.
Step-by-step instructions for screen printing
Screen printing can be done in a variety of ways, but they all use the same basic technology. The sort of printing we’ll discuss here employs a specific light-reactive emulsion to generate a bespoke stencil; it’s the most common type of commercial printing since it allows for the creation of elaborate stencils.

Here, we’ll take you to step by step through the screen printing procedure. We’ve also created a video of the process at our workshop so you can see how we make our high-quality bespoke screen-printed apparel.
Step 1: Create the design
To begin, the printer prints the design they wish to appear on the end product onto a clear acetate film. This is what will be used to create the stencil.
Step 2: Set up the screen
The printer will next choose a mesh screen based on the design’s intricacy and the texture of the cloth being printed. The mesh screen is then coated with a light-reactive emulsion, which hardens when exposed to strong light.
Step 3: Exposure of the emulsion
The design is subsequently transferred from the acetate sheet to the emulsion-coated screen, which is then put to very strong light. Because the emulsion is hardened by light, the sections of the screen that are covered by the design stay liquid.
If the final design includes more than one color, each layer of ink must be applied using a separate screen. To make multi-colored items, the printer must utilize his artistic ability to design each stencil and line them up correctly to produce a seamless final design.
Step 4: The emulsion is removed, and the stencil is created
The sections of the screen not covered by the design will have turned hard once the screen has been exposed for a certain amount of time. Any emulsion that hasn’t solidified is carefully washed away. The design is clearly imprinted on the screen, allowing the ink to pass through.
After the screen has dried, the printer will do any required touch-ups or repairs to ensure that the imprint is as close to the original design as possible. Now the stencil is finished and ready to use.
Step 5: The Object Is Ready To Print
After that, the screen is placed on the printing press. The object or garment to be printed is laid flat on the printing board beneath the screen.
Although there are manual and automatic presses, most current commercial printers will employ an automatic rotating carousel printer, which allows multiple distinct screens to work at the same time. This type of printer may also be used to apply the distinct color layers in rapid succession for multi-colored prints.
Step 6: The ink is pushed onto the object through the screen
The screen is lowered and put on the printing board. A squeegee is used to drag the ink along the complete length of the screen once it has been put at the top end. It forces ink through the stencil’s exposed sections, reproducing the design on the product underneath.
The screen is lifted, and a fresh garment is placed onto the printing board if the printer is producing numerous products. After then, the procedure is repeated.
The emulsion is removed using a specific cleaning solution once all of the pieces have been printed, and the stencil has served its function, so the mesh may be reused to make new stencils.
Step 7: The final step is to dry, inspect, and complete the product.
After that, the printed object is dried, which ‘cure’ the ink and gives it a smooth, colorfast surface. Before being passed on to its new owner, the completed product will be properly examined and cleaned to eliminate any residue.
What is DTG, and how does it work?
Direct to garment is a newer technique that first appeared in the 1990s. It first became commercially accessible in 2005, although it has only recently emerged as a viable alternative to traditional manufacturing processes, with just a few t-shirt printers offering it.
Direct to garment printing, as the name indicates, utilizes ink to print directly onto the fabric or object of your choice. It penetrates the fabric’s fibers directly, so you don’t feel the pattern or ink when you touch it.
Direct to Garment’s advantages
Compared to other traditional printing technologies, direct to garment has a lot of benefits.
- There is a large color palette to choose from.
- It’s suitable for both precise and wide designs.
- The process is quite quick.
- Both mass manufacturing and short production runs are possible.
- It is simple to use because of the low setup expenses.
- It also works on colored clothes.
- Reproduction accuracy and high-quality outcomes
- It’s made of water; thus, it’s environmentally friendly.
- Can generate designs using computer software

Screen Printing’s advantages
When it comes to screen printing, one of the most significant advantages is that it is a very cost-effective choice for bulk printing. Other advantages include:
- superior to digital prints in terms of quality
- It may be used on a range of print surfaces, including glass, wood, fabrics, signage, banners, electronics, and much more, and is more durable for long-term printing.
- Printing on certain parts of the print material is simple.
Disadvantages of Direct to Garment
- Only cotton clothing is allowed.
- Only white clothing is permitted.
- For mass manufacturing, it is not cost-effective.
- It may be slightly slower than other techniques.
- Design positioning is limited.
Screen Printing’s Disadvantages
One of the most significant drawbacks of screen printing is that it has a significantly greater initial setup cost and takes much longer than digital printing. Screen printing has a number of drawbacks, including the following:
- Color palettes are relatively restricted.
- The amount of ink utilized might provide the impression that the pattern is lifted from the print surface.
- It can’t be customized the way digital printing can.
Digital printing is particularly well suited to tiny print jobs in which a variety of colors, customization effects, or photographic imagery are required. However, if clients want to print on lighter-colored materials, digital printing may not be an option if the printer does not have white ink. The second major disadvantage of digital printing is that it is not as durable as screen printing, but it is an excellent choice for one-of-a-kind events and displays. Finally, if you choose digital printing, you will not benefit from economies of scale in print costs because prices stay the same regardless of the number of prints necessary.
If a customer requires a higher-quality, more professional-looking print, we always recommend screen printing. However, we make sure that our clients are aware of the additional time required to prepare the screens and the costs associated with screen printing. Screen printing is best for large orders that don’t require a lot of personalization or various colors. Because of recent advancements in digital printing, it is now more extensively utilized for a variety of print materials, including glass and wood.
Is Screen Printing the best option for your company?
For designs with basic graphics (preferably with only a handful of colors), screen printing can be cost-effective, but it needs upfront inputs. The order minimums for most third-party print providers range from 5 to 100 pieces.
Your screen printing bulk order’s ultimate pricing is determined by the number of colors in your designs and the number of screens required to print them. As a result, whether you’re just getting started or want to try out new ideas, screen printing might be costly.
If you don’t want stacks of clothing hanging about your house or business, ordering in bulk entails figuring out where to keep the printed apparel. Because each design must be produced in mass, this restricts the number of designs you may sell in your store.
Consider if you’ll be able to sell all of the things that are printed in order to avoid contributing to textile waste. For new business owners who do not yet have a consumer base, this might be difficult to foresee.
Some printing companies will need you to send print files that are divided into layers for each color. They may inquire about the ink color codes that should be used to print your design. Screen printing isn’t the best option if you want to “submit your design and forget about the rest.”
Is DTG Printing the best option for your company?
Direct-to-garment printing is a quick and easy approach to get your items ready for sale. You won’t have to worry about retaining stock because most third-party printers have no order minimums for DTG items. This printing approach also allows enterprises to leverage on-demand printing services.
The complete design is printed in one pass with DTG. Because DTG does not have a color count, there is no additional setup time before printing can begin; therefore, your order is completed as soon as the print file is received.
This printing strategy allows you to experiment with different ideas and markets without risking any money. You have the option to withdraw or replace the product if it does not sell.