
How to Begin Home T-Shirt Screen Printing
Using a few simple tools and ingredients, screen printing is a common method for imprinting images into t-shirts. The first steps are as follows:
Amass your resources. A screen printing kit is required, which usually consists of a frame, a mesh screen, a squeegee, and ink. T-shirts to print on and a design to print also need to be provided.
Design what you want. You can use programs like Adobe Illustrator or Canva to create your design. As an alternative, you might sketch your design by hand and scan it for use in the computer. Your design should be starkly contrasted in black and white.
Your design should be printed on transparent paper. Print your design onto transparency paper using a laser printer. Make sure to print it in black and white and at 100% scale.
Get your screen ready. Use a staple gun to affix the mesh screen in place after stretching it over the frame. Using a scoop coater, apply an emulsion coating to the screen, and allow it to dry in a dimly lit area.
Put your design on display on the screen. Transparency paper should be placed on the emulsion-coated screen and exposed to light for a predetermined period of time. Your design will appear on the screen as a stencil as a result.
Unexposed emulsion should be washed away. To remove any remaining unexposed emulsion and leave only the stencil of your design on the screen, rinse the screen with water.
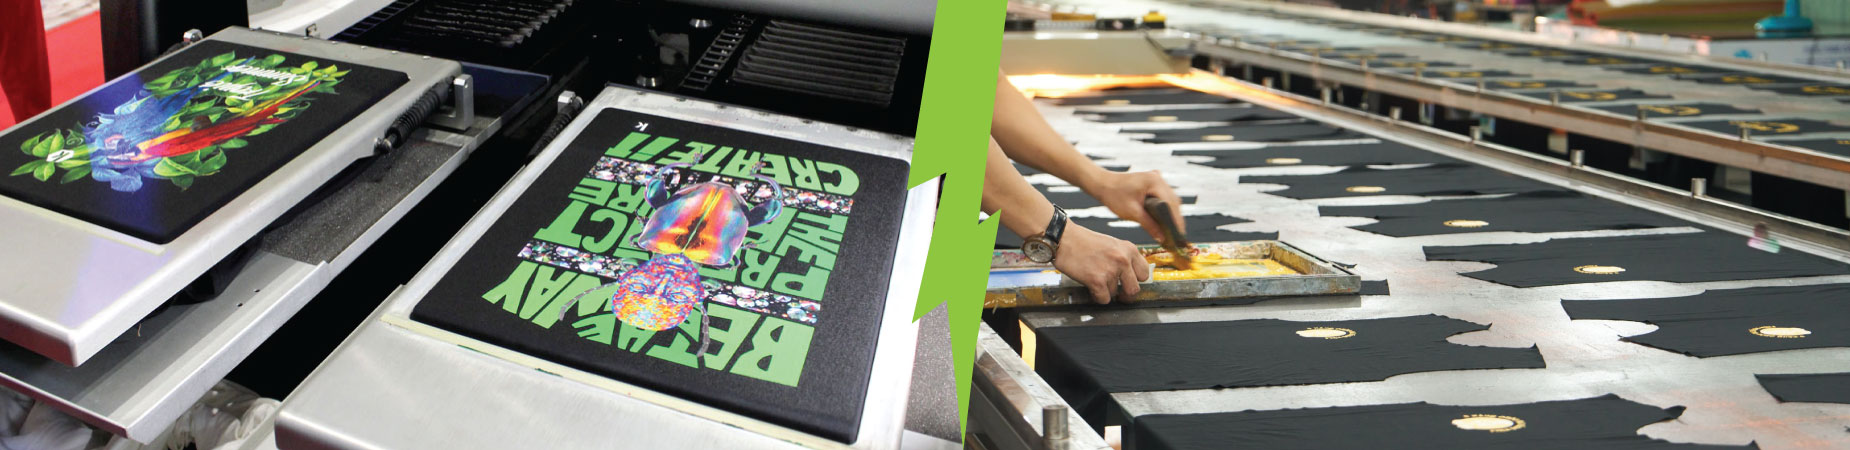
Organize your printing setup. To stop the ink from leaking through, lay your t-shirt flat and insert a piece of cardboard inside. Use the squeegee to apply ink to the screen while it is over the t-shirt, forcing it across the screen, through the stencil, and onto the garment.
Clean up your ink. You must cure the ink after printing your design onto the t-shirt. This is usually accomplished by heating the t-shirt in a dryer or a heat press.
your screen, please. After cleaning your screen with water to get rid of any last traces of ink and emulsion, let it dry.
You should be able to start screen printing your own t-shirts at home after following these steps!
WHAT IS REQUIRED FOR SCREEN PRINTING?
You will require the following supplies and equipment to screen print:
A mesh is stretched across a wooden or aluminum frame to create a screen. The mesh needs to be fine enough to hold the design’s specifics.
Emulsion: Emulsion is a liquid that is applied on the screen and is light-sensitive. It becomes harder when exposed to light, leaving a stencil of your design on the screen.
Ink: Screen printing ink is made specifically to be applied to cloth and is available in a number of colors.
Squeegee: A squeegee is used to push ink through the mesh and onto the fabric while spreading it across the screen.
Design: For printing, you will need a design. You can do this by hand-drawing it and scanning it into the computer, or you can construct it using graphic design tools.
Transparent Paper: You must use a laser printer to print your design onto this material.
Light Source: In order to expose your design on the screen, you will need a light source.
T-shirts or other types of fabric: You will require a surface on which to print your design, such as t-shirts, tote bags, or hoodies.
Drying Rack: You can use a drying rack to dry printed materials.
After printing, you’ll need a location to rinse your screen to get the ink and emulsion off of it, such as a washout booth or sink.
You should be able to start screen printing your own images onto fabric using these supplies and equipment.
WHAT IS SCREEN PRINTING?
Via the use of a stencil or design, ink is transferred to cloth during the screen printing process. The fundamentals of screen printing are as follows:
Make Your Design: You can make your design by hand-drawing it and scanning it into the computer, using graphic design software, or both. Your design should be starkly contrasted in black and white.
Employ a laser printer to print your design onto transparency paper to create your final product. Make sure to print it in black and white and at 100% scale.
Get Your Screen Ready: Use a staple gun to affix the mesh screen in place after stretching it over the frame. Using a scoop coater, apply an emulsion coating to the screen, and allow it to dry in a dimly lit area.
Put your transparency paper on the emulsion-coated screen and expose it to a light source for a predetermined amount of time to expose your design to the screen. Your design will appear on the screen as a stencil as a result.
Rinse the screen with water to remove any remaining unprinted emulsion, leaving only the stencil of your design on the screen.
Create Your Printing Setup: Put your screen over the fabric and place it on a flat surface. With a squeegee, apply ink to the screen, pressing it through the stencil and onto the fabric as it moves over the screen.
Cure Your Ink: After printing your design on the fabric, you must allow the ink to dry. This is commonly accomplished by heating the fabric in a dryer or a heat press.
Clean your screen by rinsing it with water to get rid of any leftover ink or emulsion, then letting it air dry.
You should be able to screen print a design on fabric using these steps. Getting the technique down may take some time, but once you do, you can make one-of-a-kind and personalized designs on a range of textiles.
Summary
Via the use of a stencil or design, ink is transferred to cloth during the screen printing process. A screen, emulsion, ink, a squeegee, a design, transparency paper, a light source, fabric, a drying rack, and a washout booth or sink are required for screen printing. The fundamental stages in screen printing are designing your image, printing it on transparency paper, setting up your printing station, exposing your image to the screen, washing out the exposed emulsion, curing your ink, and cleaning your screen. You can make one-of-a-kind, personalized designs on a range of materials with some practice.